Final Image Preview

Step 1
Weeks ago, when I published my tutorial about the 3D airplane, I was looking everywhere for a free 3D model with a Creative Commons license. In my quest to find it, I notice some cool websites with absolutely awesome 3D objects to available to play with. For this tutorial, we will use a nice 3D car downloaded from CGIndia.org. When I opened the car in Photoshop I saw the axis planes (X,Y,Z) were part of the model too. This inspired the idea of creating a blueprint of the different views of the car.
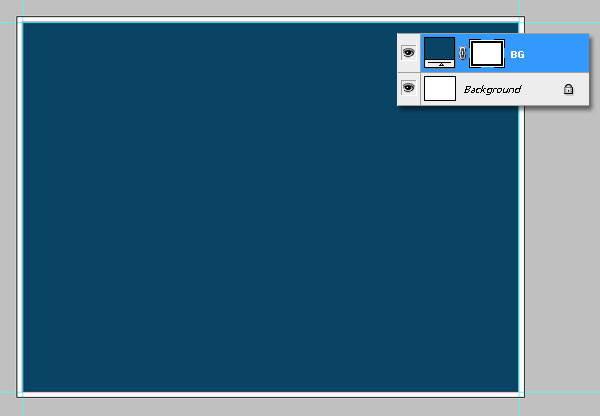
After downloading the car model, create a new blank document 1024 pixels by 768 pixels. Then select a white background. Then create a blue (#094464) square over the white layer. This creates a white margin.
Step 2
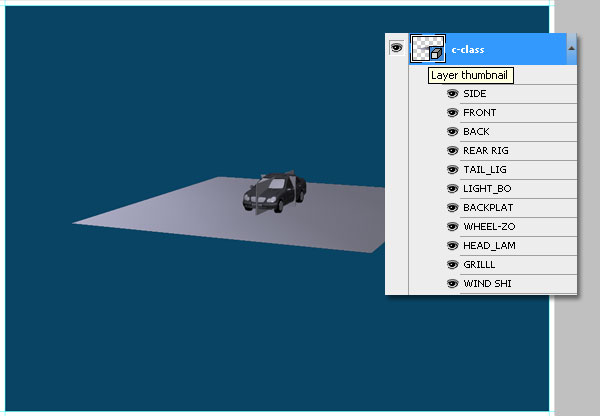
Create a new 3D layer by going to Layers > 3D Layers > New layer from 3D file. Then find the "3D car" file and press OK.
Step 3
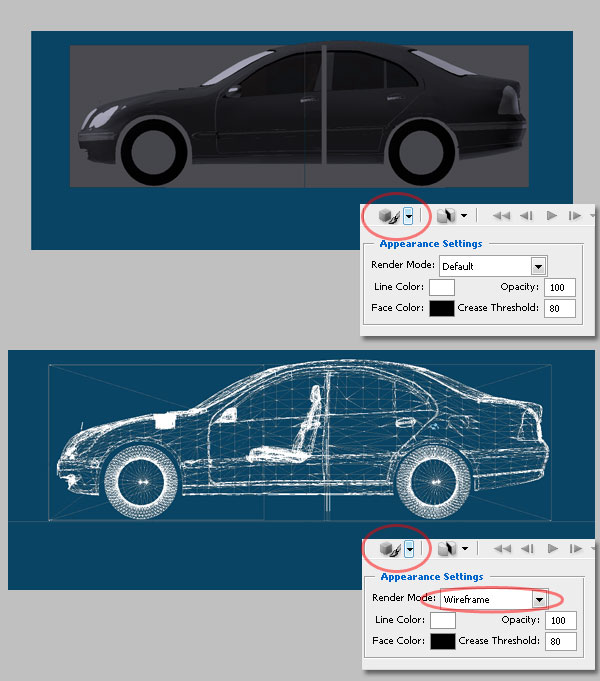
Double-click the 3D layer to edit it. Change the size of the car by making it bigger. Then change the View to Left or Right (depends on you and the model you're using). I don't know why, but on my PC this is the Front view. The trick to creating the blueprint is to change the Render mode from Default to Wireframe.
Step 4
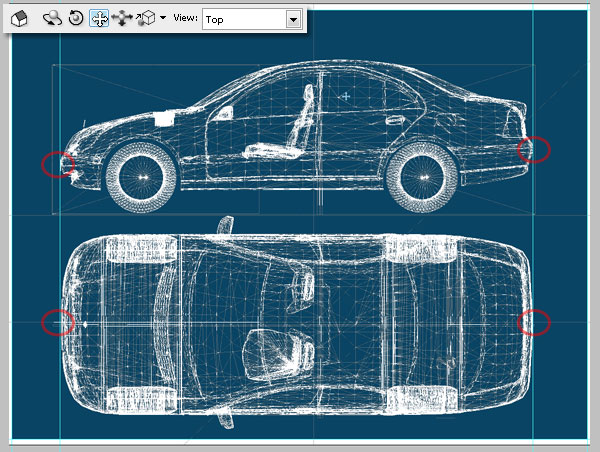
Now Alt+Drag to duplicate the 3D layer. Then change the copy's view to Top. Place the copy below the first view. Also, add some guides to ensure the car's width is the same in both layers.
Step 5
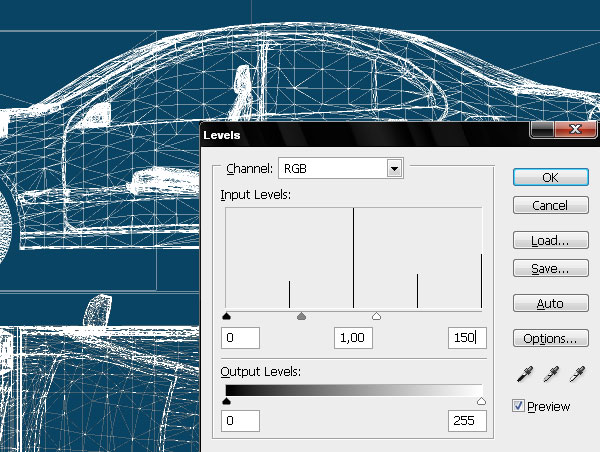
Rasterize both 3D layers by going to Layer > Rasterize > 3D. Then adjust each layer levels to increase the white of the lines using these values.
Step 6
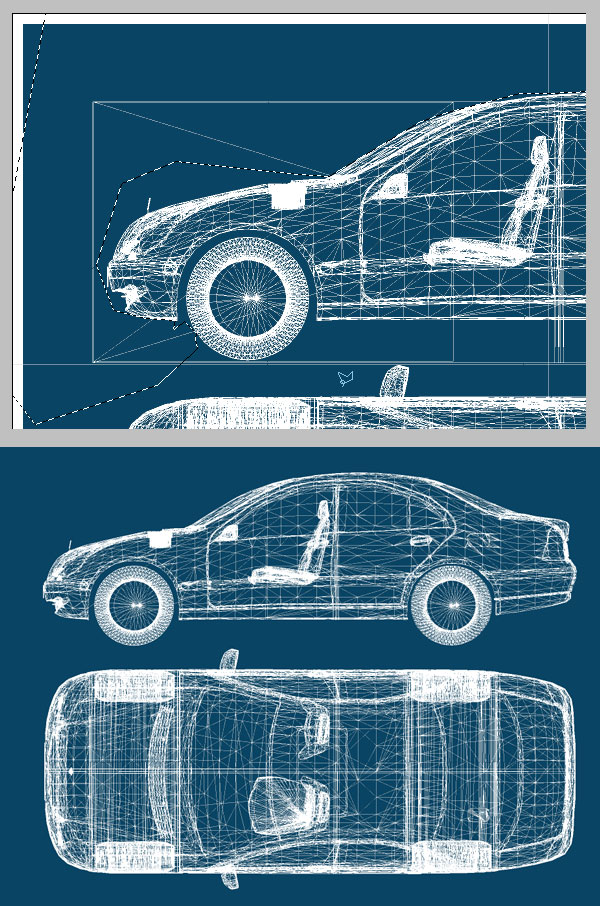
Delete all the extra lines using the Lasso Tool.
Step 7
Now resize both layers, by the way I named them "Car Side" and "Car Top." Also, add some space between them.
Step 8
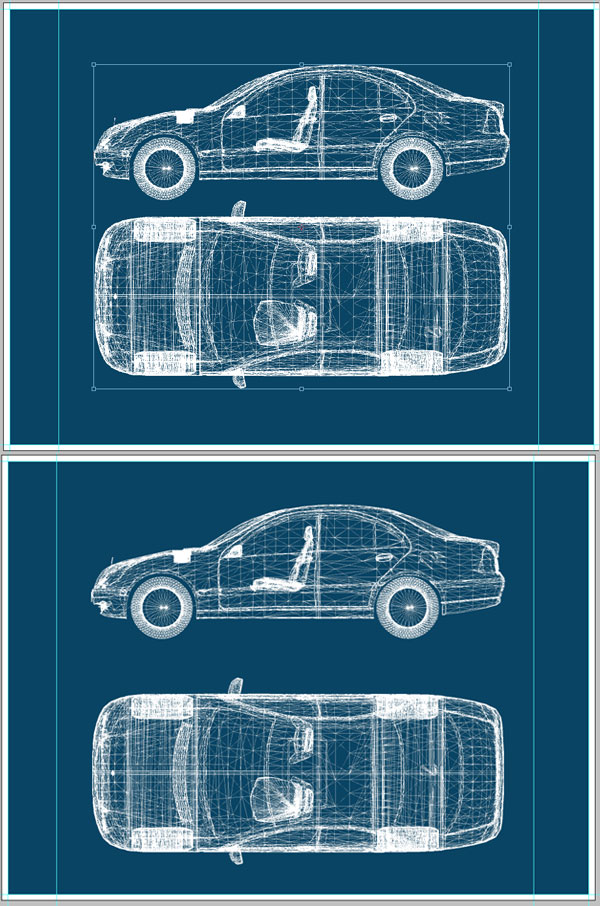
Next we'll create some lines to get a more realistic blueprint result. First, show the Ruler CTRL+R. Then click the Ruler and drag the cursor to draw a guide. Make sure the guides touch the critical points of your views, like the wheel's diameter, or the car's width and height. Try to get something like the image below.
Step 9
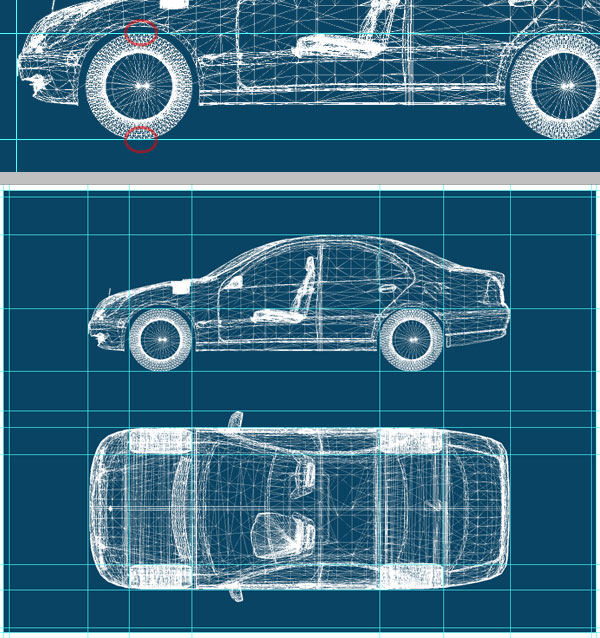
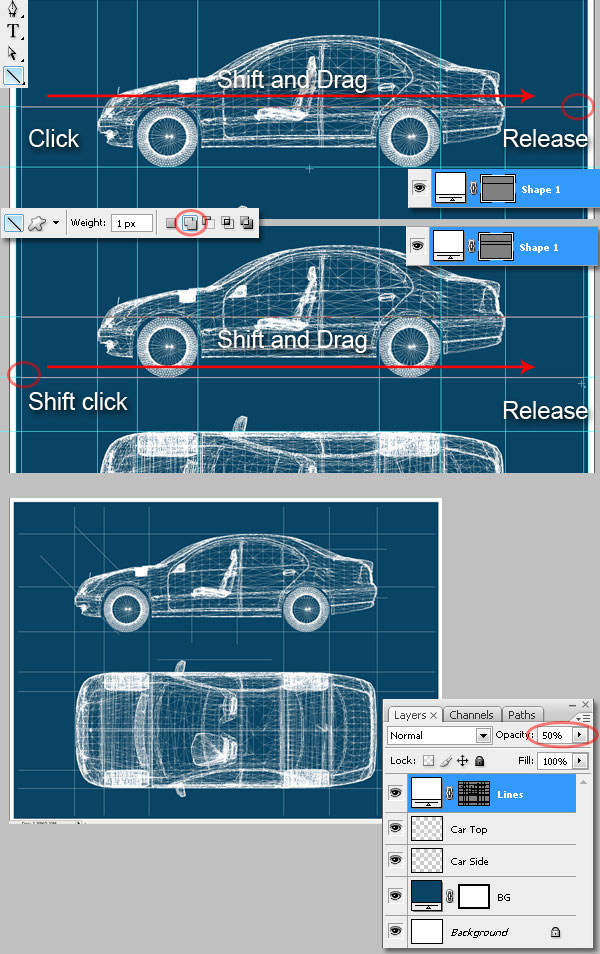
Using the guides, start drawing some lines. Grab the Line Tool and select a white foreground and 1px weight. Then Shift + click and drag to draw the lines (by using shift and drag you will draw perfect horizontal, vertical, or 45º lines).
Draw a line first, then Shift + click to start the second one. This will activate Add to Shape to add the second line into a unique Layer Mask. Using this step draw as many lines as you want, not too many, but not too few either. Change the layer Opacity to 50%.
Step 10
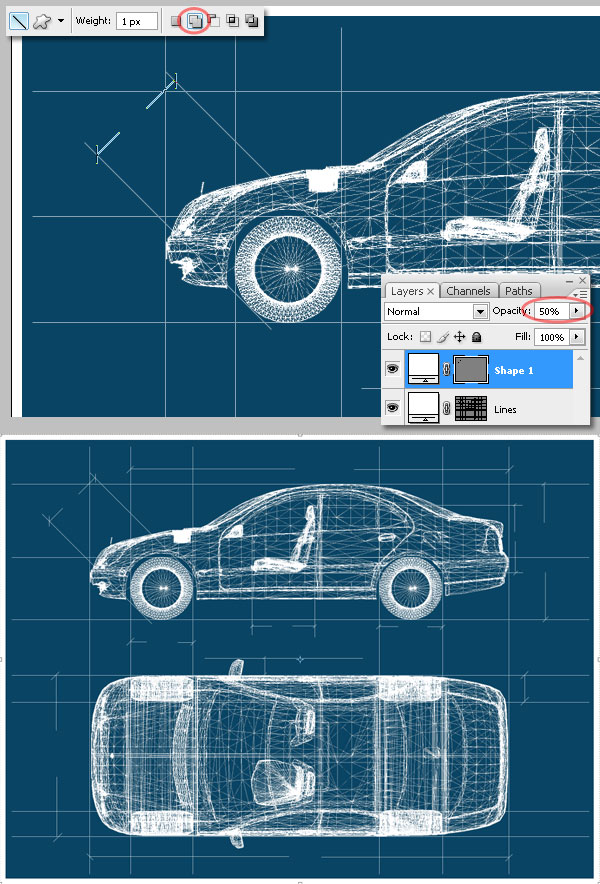
Using the same steps, create a new layer and draw some white lines on it. These lines will show some of the car's dimensions. Create some of this lines between two of the previously draw lines. Again, use the Add to Shape option to add all the lines into a single Vector Mask. Then change the Layer Opacity to 50%.
Step 11
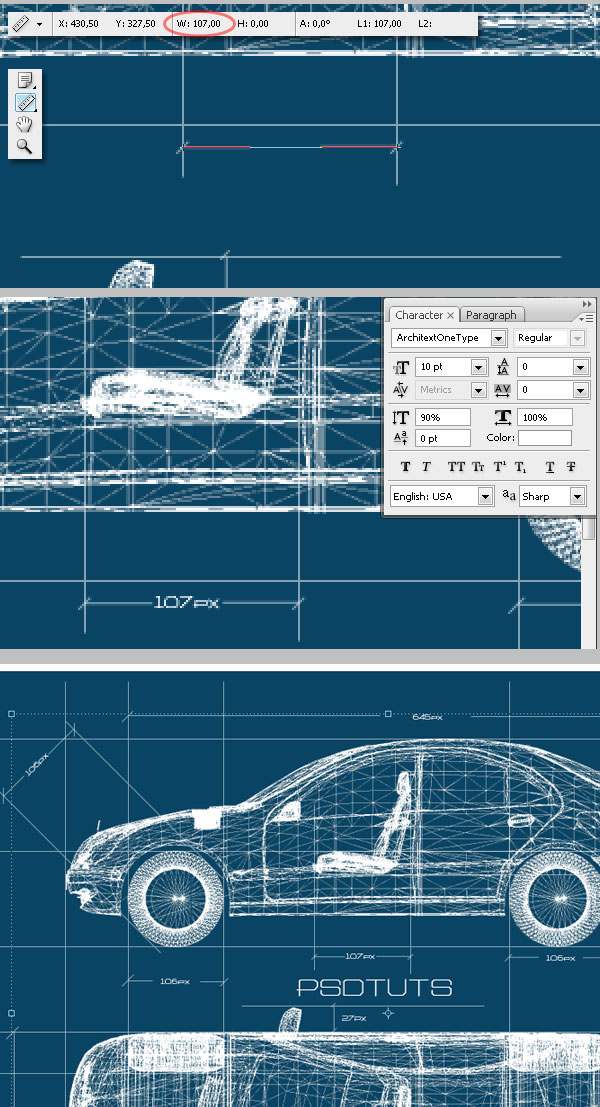
Now add some measurements. You can use some random numbers, but imagine that this is a mock-up of a real-life 3D model, like a house. So, you must transcribe the right dimensions to please the client. For this use the Ruler tool, and select pixels as the measure unit. Finally type the dimension; I used this font to create the text.
Step 12
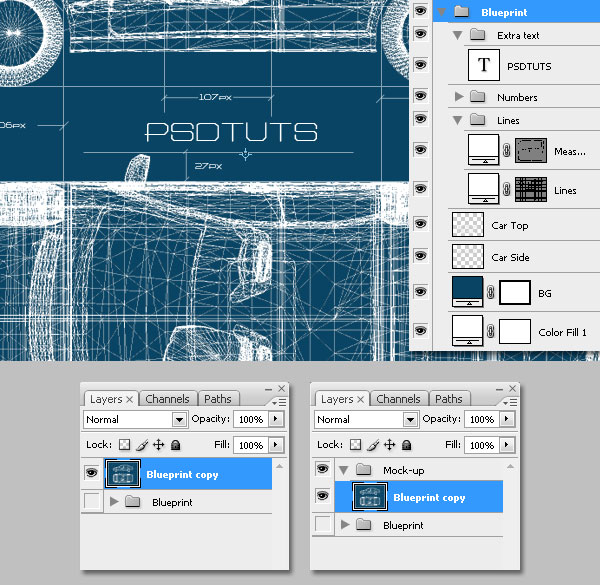
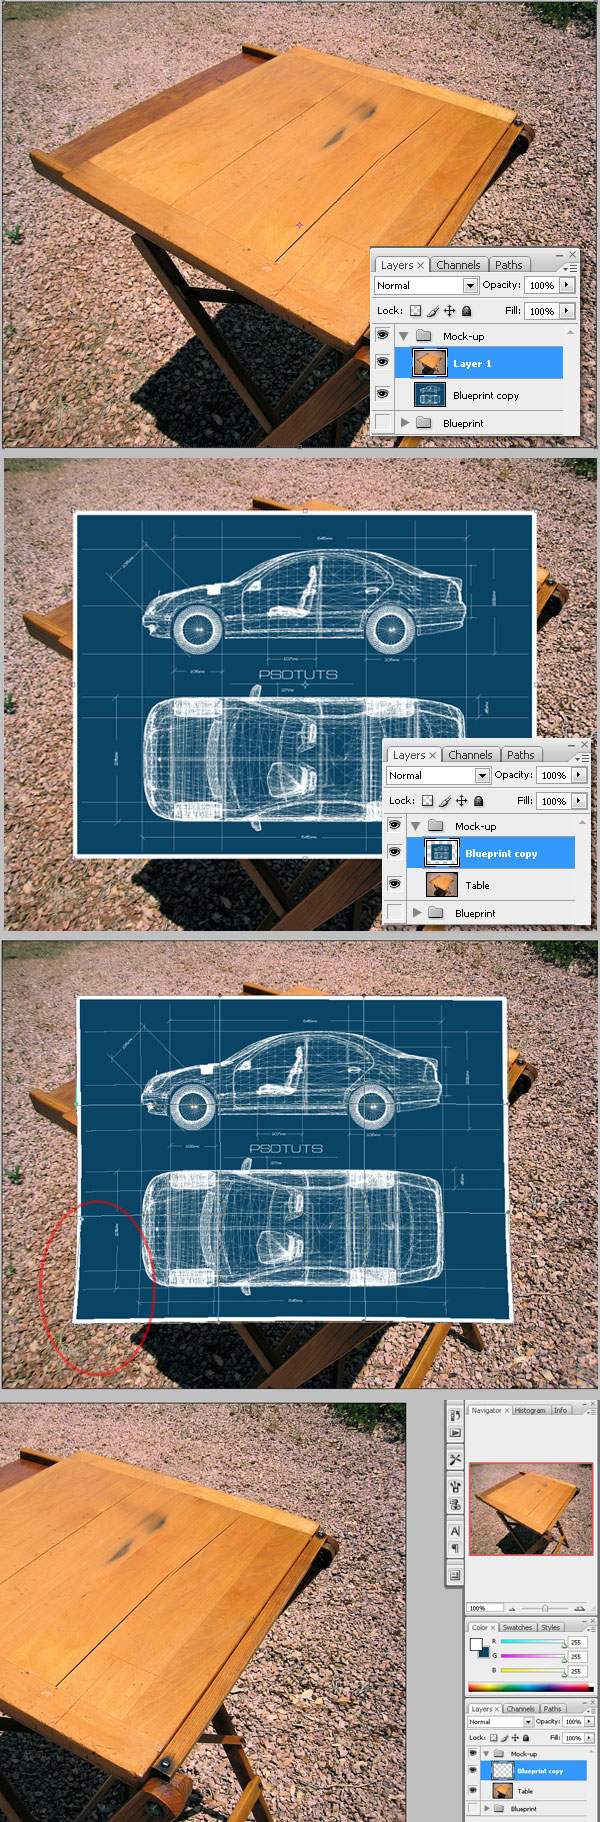
Let's organize the layers a little bit. Create a Layers Group and name it "Blueprint." Then put all the layers inside it, also create a folders for the numbers, lines and all the extra text. Then duplicate the "Blueprint" group. Then hit Ctrl+E to Merge it. Create a new group outside and name it "Mockup." Then put the "Blueprint copy" inside of it, and hide the "Blueprint" group.
Step 13
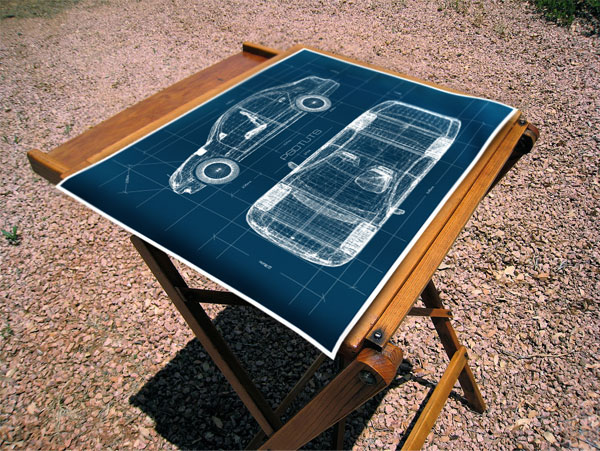
Paste this image into a new layer. It's a picture of a nice drawing table. Resize the "Blueprint copy" to make it smaller. Then use the Warp tool to distort it a little bit, specially the bottom left corner. Finally, Select All (Command+A) and Cut (CTRL+X) the "Blueprint copy" layer.
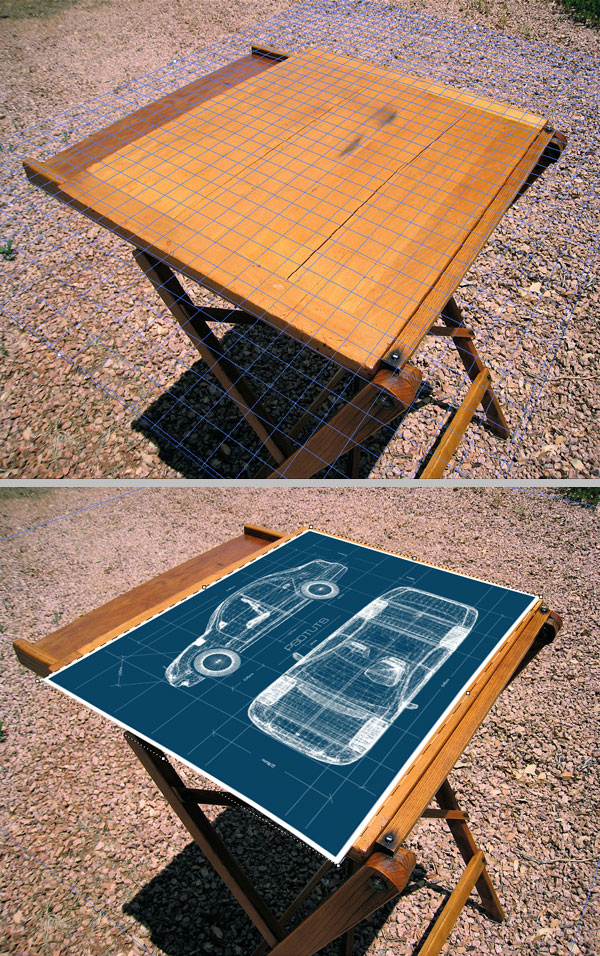
Step 14
Select the empty "Blueprint copy" layer. Then go to Filter > Vanishing Point, and draw a plane over the table. Then extend it a little bit, and paste the "Blueprint" as shown in the image below. Try to get the blueprint's left side out of the drawing table bounds. Then click OK.
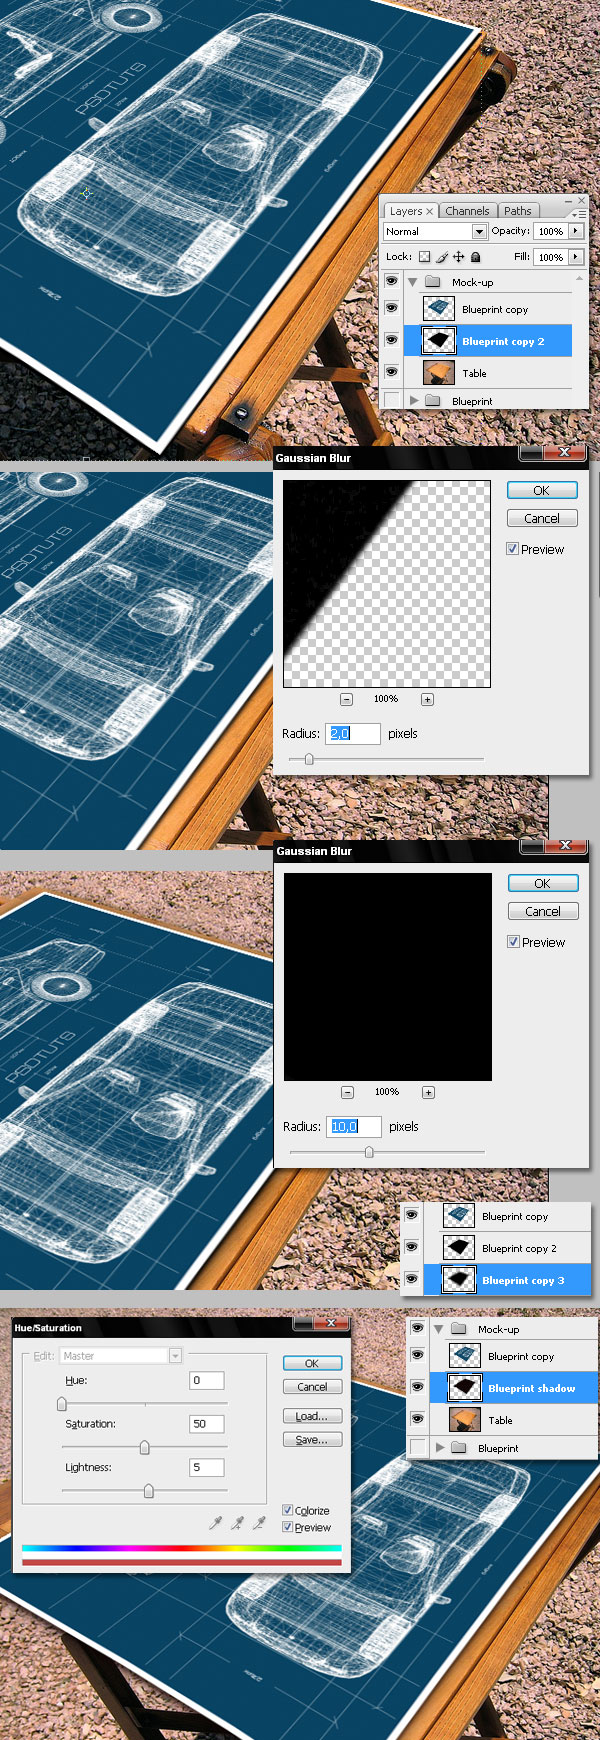
Step 15
Duplicate the "Blueprint" layer and fill it with black. Then apply a Gaussian Blur with 2px radius. Then duplicate the "shadow" layer, and apply to the copy another Gaussian Blur with a 10px radius this time. Merge both "shadow" layers and adjust the Hue/Saturation using the values shown at the bottom of this image.
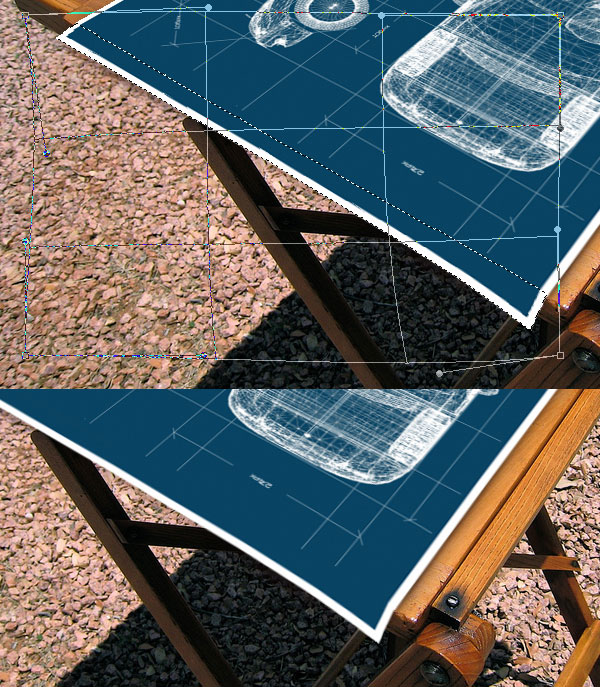
Step 16
Select all the extra paper out of the left table bounds. Distort it using the Warp tool, just a little bit; ensure that the white border remains the same.
Step 17
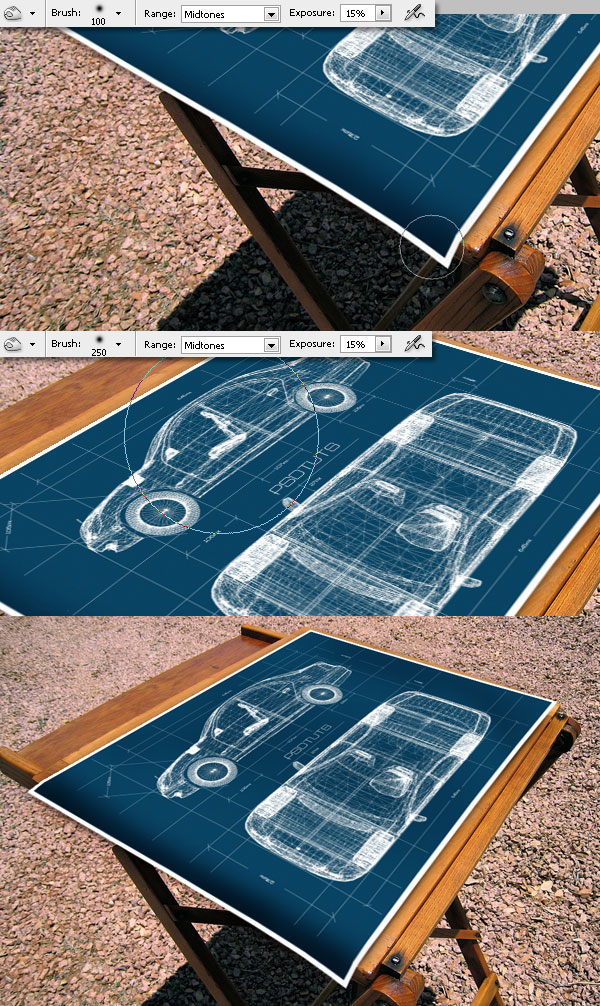
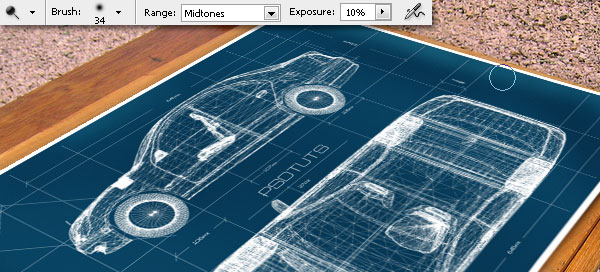
Using a the Burn tool, add some shadows to the folded blueprint. Also, add some random shadows over the entire blueprint surface.
Step 18
With the Dodge tool add some highlights.
Step 19
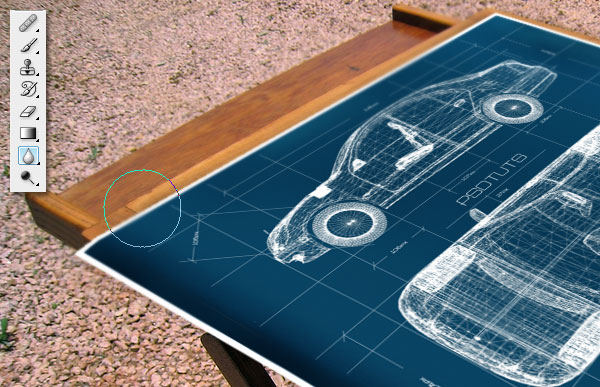
Duplicate the "Shadow" layer. Then press Ctrl+F to re-apply the last filter again (Gaussian blur 10 px radius). Then use the Eraser tool to delete some areas of the new shadow. Delete all the areas outside the table too.

Step 20
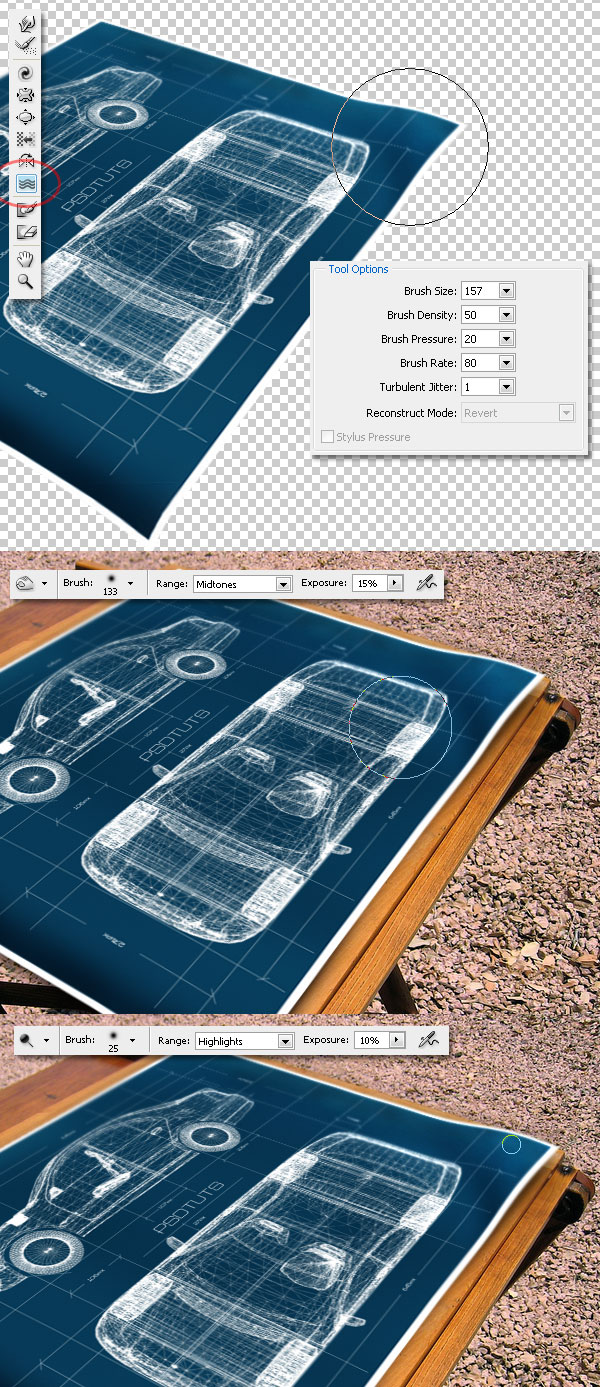
Using the Blur tool, blur the image a little bit at the top and right side of the blueprint. Don't overdo this, rather apply only the necessary blur amount.
Step 21
Select the "Blueprint" layer of our mock-up. Then click on Filters > Liquify. In the Liquify Filter Window select the Turbulence tool. Then set the values as shown below; just do a few soft click and drags to create more wrinkles over the plane. Then click OK. You can use the Dodge and Burn tools again to get a better result.
Conclusion
This is it! a simple and fast technique to create blueprints of real objects using Photoshop Extended CS3's 3D tools. Try it using some architectural models like a house or a building. If you work with this kind of design, you can blow your clients minds.
No comments:
Post a Comment