In this Photoshop tutorial we will use the pen tool, paths brushes and brush dynamics along with a neat little trick using thresholds to create a cool album cover look. This tutorial is a bit involved and assumes that you are proficient enough in Photoshop to follow along without me holding your hand. That being said, lets jump right in.
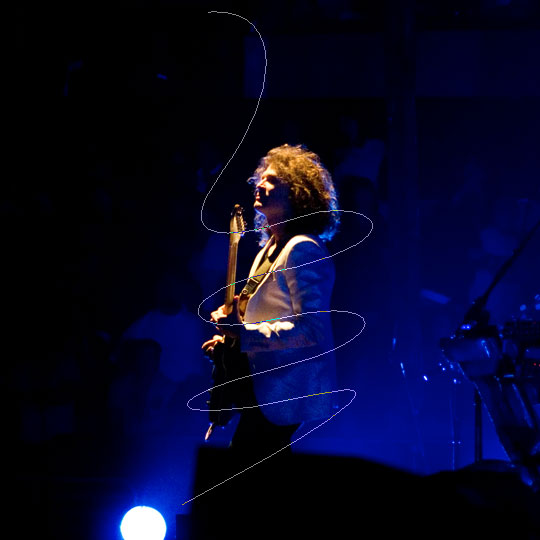
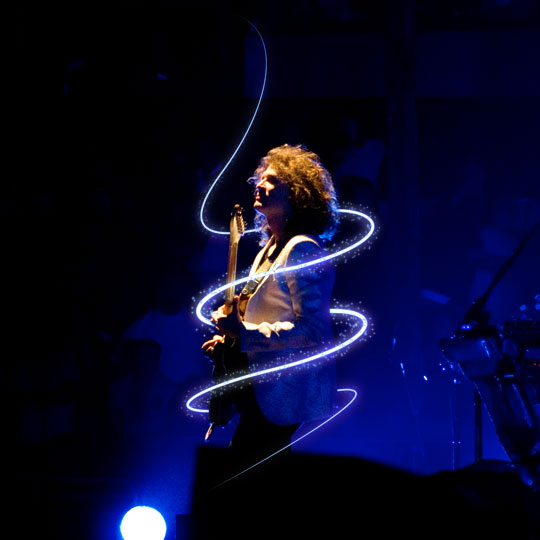
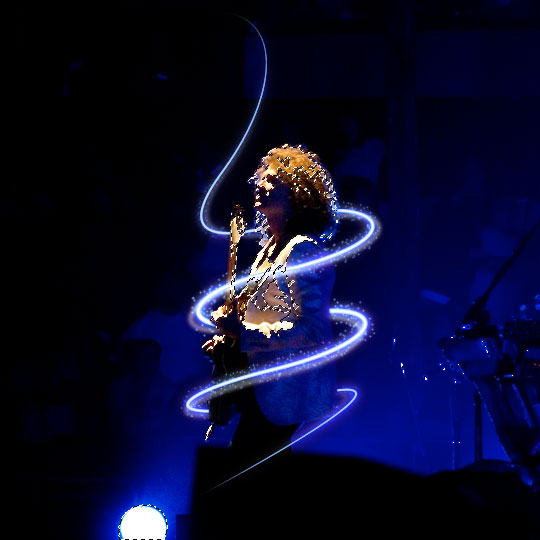
I took this photo at a show The Killers played at Madison Square Garden in New York this past summer… packed house, great crowd… anyway, here’s the photo. The image is included in the lesson files available for download at the end of the tutorial.
Lets first start by drawing a nice curvy path with the pen tool that we’ll use as our main wrapping glow line. In the Paths palette be sure to rename the path so you don’t loose it when we create a new one.
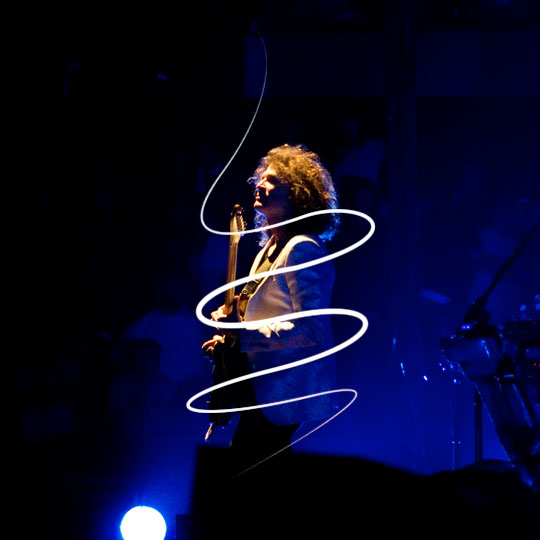
Create a new layer called "First Stroke" and switch to the Brush tool. Choose the 5 pixel round brush with hard edges, set the foreground color to white and click back to the Pen tool. Now simply Right-Click (Mac: Control-Click) anywhere on the path and choose Stroke Path. When the dialog box pops up choose Brush and Simulate Pressure. The pressure simulation will ensure that the stroke tapers off at each end.
With your tool of choice remove the sections along the stroke that should be behind your subject. I use the Pen tool.
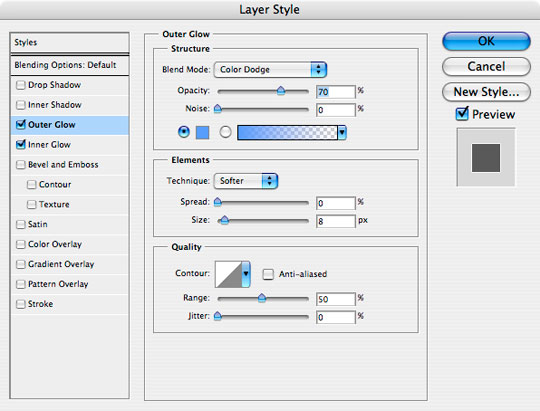
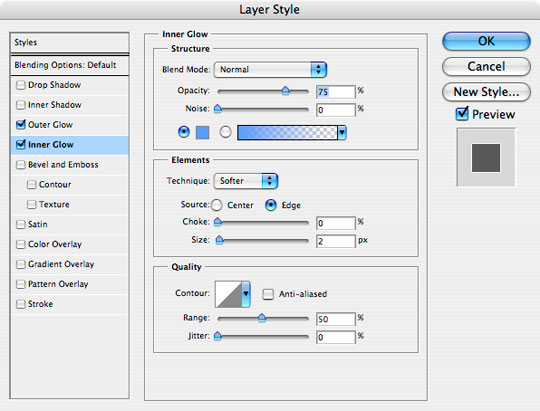
Add an Inner and Outer Glow as shown below. The blue color I’m using in both styles is #6d9bff. This will be the only layer style we’ll be using and we’ll copy and paste this one onto subsequent layers as we go.
Duplicate the "First Stroke" layer, clear the layer styles and add a 6px Gaussian Blur. This will add an additional glowing effect around the original stroke.

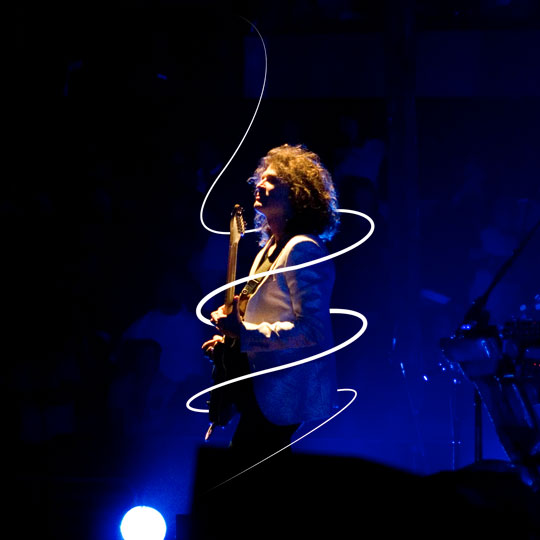
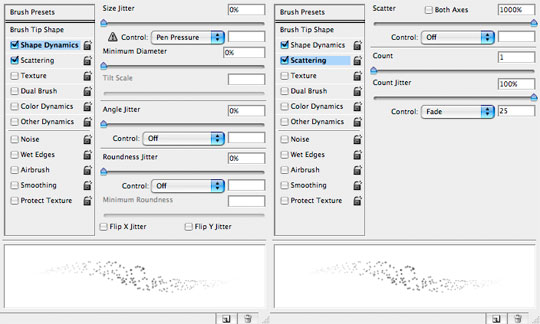
Create a new layer called "Particles", activate the Path we created earlier and switch to the Brush tool. Choose a round brush of 3 pixels with a hardness of 0%, then under the Brushes palette set Shape Dynamics and Scattering to the following. (*note: make sure your foreground color is still white)
Switch back to the Pen tool and stroke the path just like before, then remove the overlapping sections. This time the eraser tool will probably be the easiest way to remove the overlapping dots.
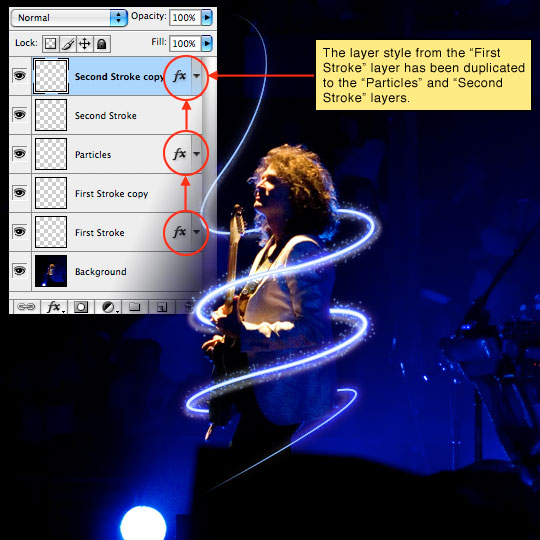
Copy the layer style from the "First Stroke" layer and paste them into the "Particles" layer. (*note: This can be done easily by holding down the Option (PC: Alt) key while clicking and dragging the style icon from one layer to the other.)
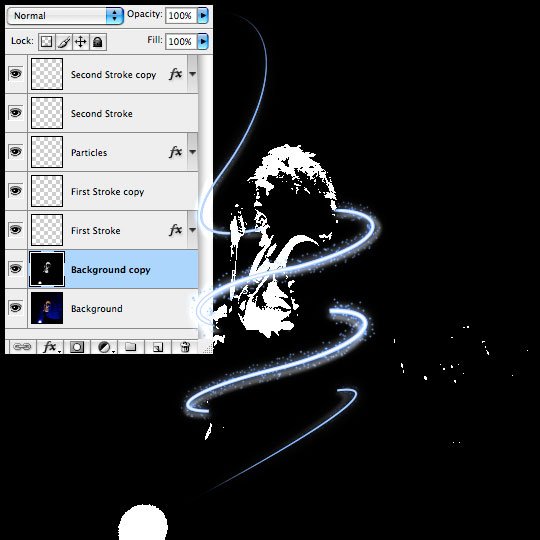
Create a new layer called "Second Stroke", create a new path similar but not the same as the original with the Pen tool (or duplicate the earlier path and change it a little) then repeat steps 2-5 but this time use a 3 pixel brush and reduce your Gaussian Blur to 3 on the copy layer. Play with a lower opacity on these layers until the effect looks right to you and don’t forget to copy the layer style onto the "Second Stroke" layer.
Now that the glow effects have been completed it’s time to really have some fun with this image.
Click on the Background layer and duplicate it by pressing Command-J (PC: Ctrl-J). Choose Image>Adjustments>Threshold from the main menu and use a setting around 85. This will obviously vary depending on your application of the technique.
Grab the Magic Wand tool by pressing W and then click anywhere in the field of black. This may not have selected all the black if there are isolated pockets so choose Select>Similar from the main menu to ensure all the black pixels are selected.
Invert the selection by pressing Command-Shift-I (PC: Ctrl-Shift-I) then drag the layer to the trash and select the Background layer. (*note: your selection will still be active.
Duplicate the selected area by pressing Command-J (PC: Ctrl-J). This will create a new layer with just the selection copied onto it. Call this layer "Partial".
The selection will be gone and it won’t look like anything has happened, so create a new layer between the "Partial" layer and the "Background" layer, call it "Black" and fill the entire layer with black.
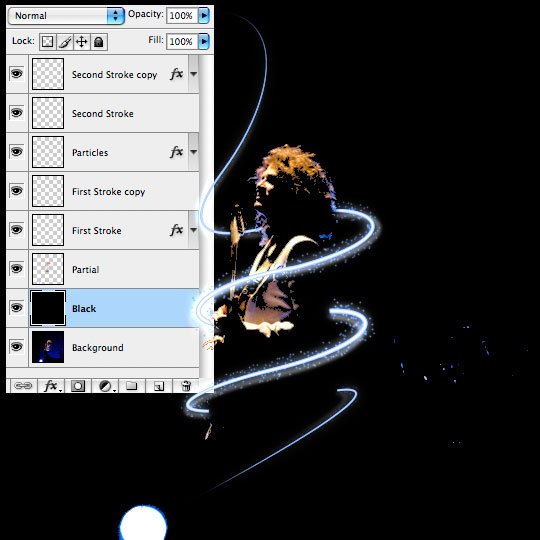
Click back to the "Partial" layer and use the eraser to remove all those annoying artifacts outside the artwork that we want to keep.
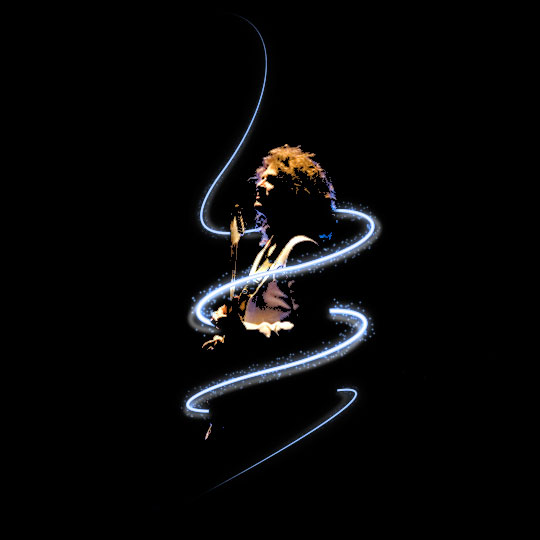
For my finished image I added the graphic as an CD album cover.

Download psd : http://pshero.com/assets/tutorials/0021/pshero_0021.zip
No comments:
Post a Comment